Best practices for welding mild steel
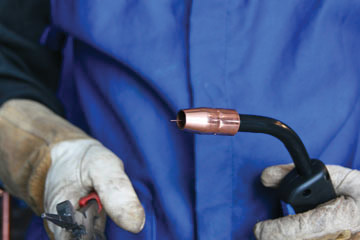
- Wire stick-out: Stick-out is the length of
unmelted electrode extending from the tip of the contact tube and it
does not include arc length. Generally, maintain a stickout of 3/8 inch
and listen for a sizzling bacon sound. If the arc sounds irregular, one
culprit could be that your stickout is too long, which is an extremely
common error.
- Push vs. pull: The push or forehand
technique involves pushing the gun away from (ahead of) the weld puddle.
Pushing usually produces lower penetration and a wider, flatter bead
because the arc force is directed away from the weld puddle. In
addition, pushing usually offers a better view and enables you to better
direct wire into the joint.
With the drag or backhand technique (also called the pull or
trailing technique), the welding gun is pointed back at the weld puddle
and dragged away from the deposited metal. Dragging typically produces
deeper penetration and a narrower bead with more buildup.
- Travel angle: Travel angle is defined as
the angle relative to the gun in a perpendicular position. Normal
welding conditions in all positions call for a travel angle of 5 to 15
degrees. Travel angles beyond 20 to 25 degrees can lead to more spatter,
less penetration and general arc instability.
- Work angle: Work angle is the gun position
relative to the angle of the welding joint, and it varies with each
welding position and joint configuration (see below).
Flat position welding
- Butt weld (a 180-degree
joint). Hold the gun at a 90-degree angle to the workpiece, directing
the filler metal straight into the joint (but don't forget to include
your travel angle of 5 to 15 degrees). A small, back-and-forth motion
with the gun can help fill a large gap or when making multiple passes. A
slight pausing at the side of a weave bead can help avoid undercut.
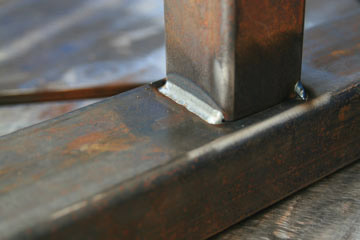
- T-joint (a
90-degree joint; the type of weld on this joint is called a fillet
weld). Keep the gun at a 45-degree angle, or equal distance from each
piece. When making multiple weld passes, the work angles change
slightly. This helps avoid uneven weld beads and undercuts.
- Lap joint (also a fillet weld). Angle the gun between 60 and 70 degrees. The thicker the metal being welded, the greater the angle.
Horizontal position tips
Because
of the effects of gravity, the gun work angle must be dropped slightly
by 0 to 15 degrees. Without changing the work angle, the filler metal
may sag or rollover on the bottom side of the weld joint. The travel
angle, whether using a push or a drag technique, generally remains the
same as for a weld joint in the flat position.
When
making multi-pass welds on thick metal, or to bridge a slight gap where
fit-up is poor, weave beads may be used to fill a weld joint. A slight
hesitation at the top toe of the weld helps prevent undercut and ensure
proper tie-in of the weld to the base metal.
Voltage
and amperage settings for welding in the horizontal position are
usually the same or slightly less than settings for welding in the flat
position.
Tips for welding in vertical positions
Vertical
welding, both up and down, can be difficult. This makes pre-weld set-up
very important for making high quality welds. Since you are fighting
gravity, consider reducing the voltage and amperage 10 to 15 percent
from the settings for the same weld in the flat position.
The
vertical down technique helps when welding thin metals because the arc
penetrates less due to the faster travel speed. Because vertical down
welding helps avoid excessive melt-through, welders sometimes place very
thin materials in the vertical position even if they can weld them in
the flat position. When welding vertical down, begin at the top of a
joint and weld down. For thin metal where burn-through is a concern,
direct the wire away from the weld puddle. Keep the electrode wire on
the leading edge of the weld puddle. A very slight weave may help
flatten the weld crown.
With
a The vertical up technique, begin is beginning at the bottom of a
joint and welding up. This can provide better penetration on thicker
materials (typically 1/4 inch or more). The travel angle of the gun is a
5 to 15 degree drop from the perpendicular position. A slight weaving
motion can help control the size, shape and cooling effects of the weld
puddle.

Overhead position welding
Drag,
push or perpendicular gun techniques can be used for welding overhead.
But because of gravity, travel speeds must be fast enough so that the
weld metal does not fall out of the joint. Also for this reason, weave
beads should not be too wide. Lowering the voltage and amperage help
keep the weld puddle small and more controllable (which is why you might
want to consider using a smaller diameter wire).
To learn more about welding positions, check out this in-depth article.
Practice, practice, practice!
Note
that travel speed — the rate at which you move the gun along the joint —
influences the shape and quality of a weld bead to a significant
degree. Many experienced MIG welders determine the correct travel speed
by judging the weld puddle size in relation to the joint thickness.
Knowing that a weld bead needs to be no larger than the thinnest section
of metal being welded, they adjust their travel speed accordingly. They
also keep the arc on the leading edge of the puddle and don't let the
molten metal get ahead of them.
Most
people can create good-looking, high quality MIG welds with a
combination of practice and following the techniques discussed.